How to make Word documents accessible
Create an accessible PDF from Word
You can create an accessible PDF from a Word document by tagging it correctly and exporting it using the right settings.
On this page
- What a tagged PDF is
- Before you convert
- Convert a Word document to a tagged PDF
- Do not print to PDF
- Check your PDF for accessibility
- Accessibility standards and resources
What a tagged PDF is
A tagged PDF includes hidden structural information that helps assistive technologies understand the content.
Tags label elements such as:
- headings
- paragraphs
- lists
- tables
- images
- bookmarks
This structure allows screen readers and other tools to navigate and read the document correctly.
If a document is not tagged, or is tagged incorrectly, it will not be accessible.
Before you convert
Well-structured Word documents are more likely to produce accessible PDFs.
Simple documents
Most simple documents will convert well if they use:
- built-in heading styles
- properly formatted lists
- descriptive link text
- images with appropriate alt text
Using Word’s built-in features preserves structure during conversion.
Complex documents
Documents with complex layouts may not convert correctly, including:
- multiple columns
- complex tables
- form fields
These may require specialist software, such as Adobe Acrobat Pro.
If your PDF cannot be made fully accessible, you must also provide the content in an accessible format, such as:
- a web page (preferred)
- an accessible Word document
Convert a Word document to a tagged PDF
Follow these steps in Office 365.
Step 1: Run the Accessibility Checker
- Go to the Review tab
- Select Check Accessibility
- Fix any issues identified, such as:
- adding alt text to images
- marking decorative images correctly
This ensures your document is ready to export.
Step 2: Prepare the PDF export
- Open File > Info
- Add a document title in Properties (Title field)
- Go to Export > Print
- Select Create PDF/XPS
- If prompted to Investigate Accessibility, fix any issues before continuing
Step 3: Confirm tagging options and save
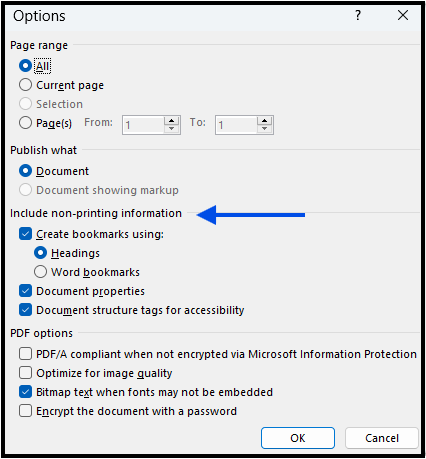
- Select Options
- Under Include non-printing information, make sure these are selected:
- Create bookmarks using headings (or bookmarks if used instead)
- Document properties
- Document structure tags for accessibility
- Select OK and save the file
If your document includes both headings and bookmarks, use headings for better structure and navigation.
Using “Save As” or “Save a Copy”
You can also create a PDF using these options. You must:
- select PDF (.pdf) as the file type
- choose Investigate Accessibility if prompted
- go to More options, then Options to confirm tagging settings
Do not print to PDF
Do not use Print to PDF.
This removes accessibility features such as:
- headings
- hyperlinks
- alt text on images
- document structure
Printed PDFs are only suitable for printing, not for online use.
Check your PDF for accessibility
Step 1: Check document properties
- Open the PDF in Acrobat Reader or Acrobat Pro
- Go to Menu, then Document Properties (or press Ctrl + D)
- In the Description tab, check Tagged PDF is set to Yes
If it says No, review your Word document and export settings.
Step 2: Check structural elements
A tagged PDF must also be correctly structured, not just tagged.
Check that structure has been retained by viewing either:
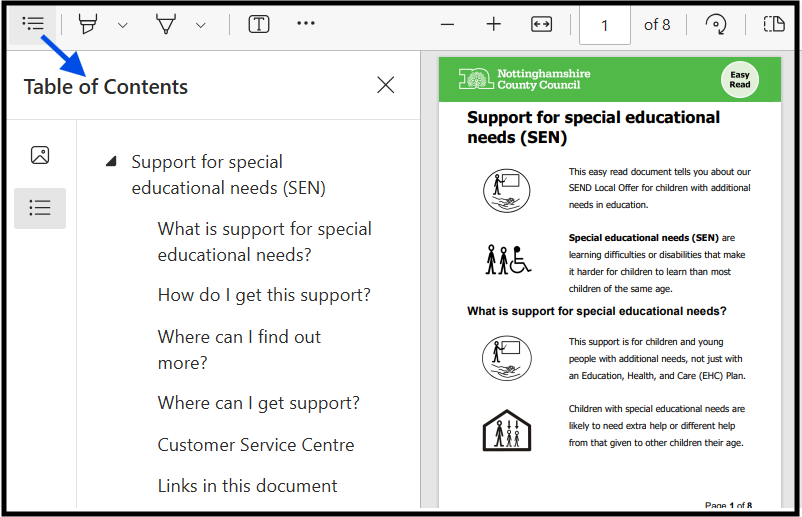
- the Contents panel in a web browser
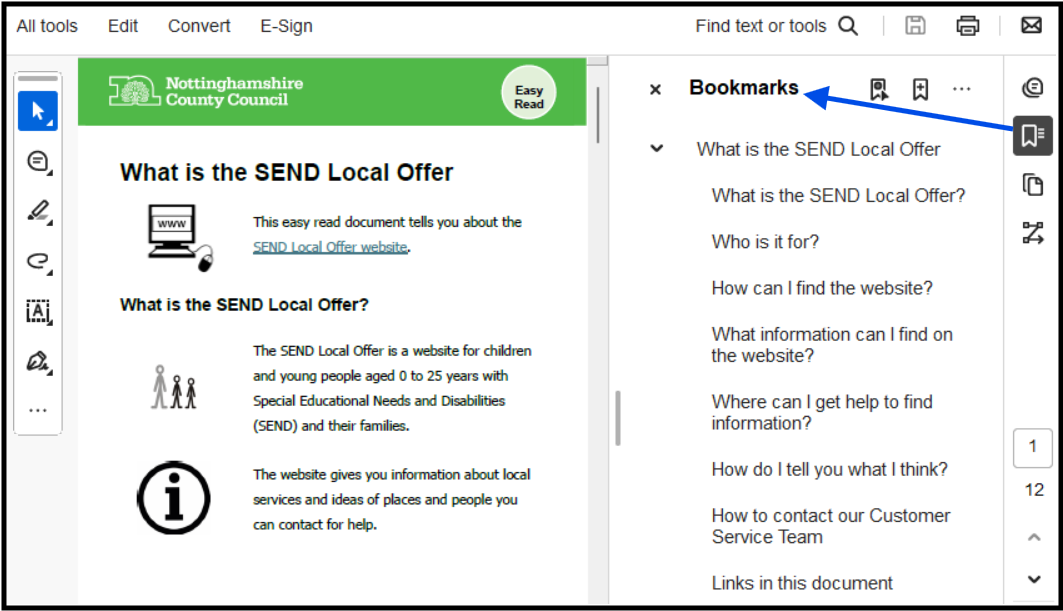
- the Bookmarks panel in a PDF reader
Make sure:
- headings or bookmarks appear
- the order matches the original document
- there are no missing or skipped headings
Accessibility standards and resources
Following this guidance helps more people access council content and supports meeting UK accessibility regulations, including PSBAR 2018.
If system or format limits stop you from following this guidance, contact the Communications and Marketing team before publishing.